When you’re married to an engineer who majored in physics and minored in math and procreated a child who is currently enrolled in an accelerated math class (and acing it! #proudmom) – coupled with someone like me who loves to bake – March 14, or Pi Day (3.14), is definitely a day that is commemorated and celebrated in our house.
Once we started going gluten free a few years back, however, the Pie part of Pi Day celebrations went to the wayside. I made a few valiant attempts at gluten free pie crusts but would inevitably end up super frustrated at how difficult they were to manage. Swear words were uttered, dough flung across the room, screams of rage echoing across the house…it wasn’t a pretty sight, and wasn’t worth driving myself insane over. I resigned myself to either ordering a pie from a local gluten free bakery (which was…alright, I guess, and usually really expensive…) or using the pre-made gluten free pie crusts that looked like a decent pie crust but tasted something more akin to tasteless cardboard. Ew.
Fast forward to last fall, when I came across this gluten free pie dough recipe on the good old World Wide Web, and decided to give it a whirl. Well, my friends…this one is it. It tastes great and handles much like a regular pie dough! I will admit that this dough is slightly more delicate than one made with wheat because, well, there’s no gluten to hold it together, but honestly overall it’s so much easier to handle and work with than any other gluten free version I’ve tried that I really don’t mind too much.
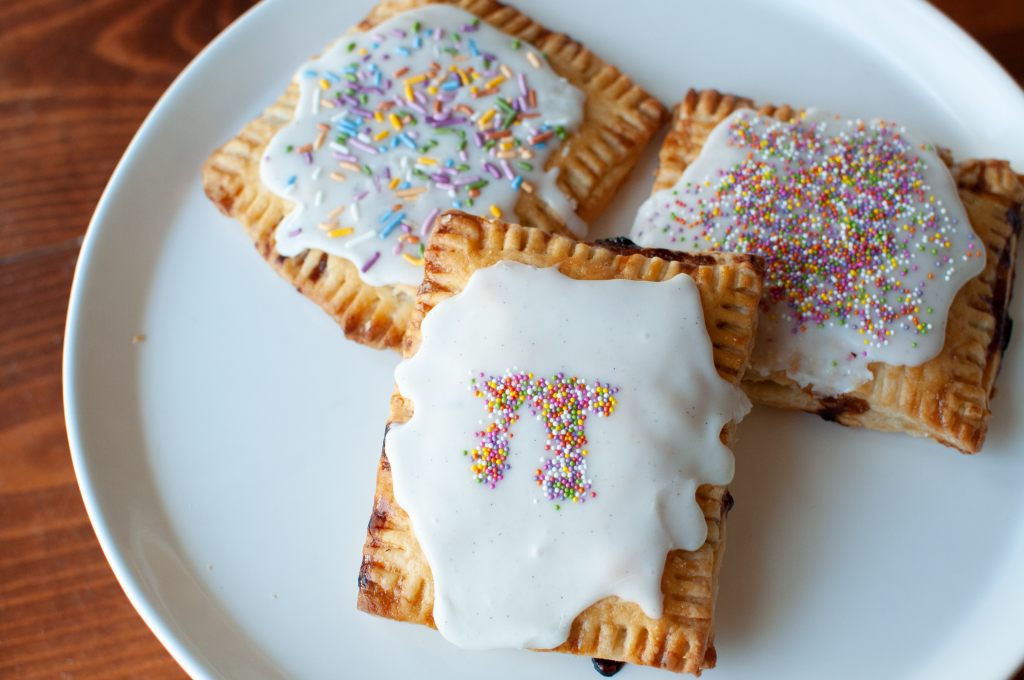
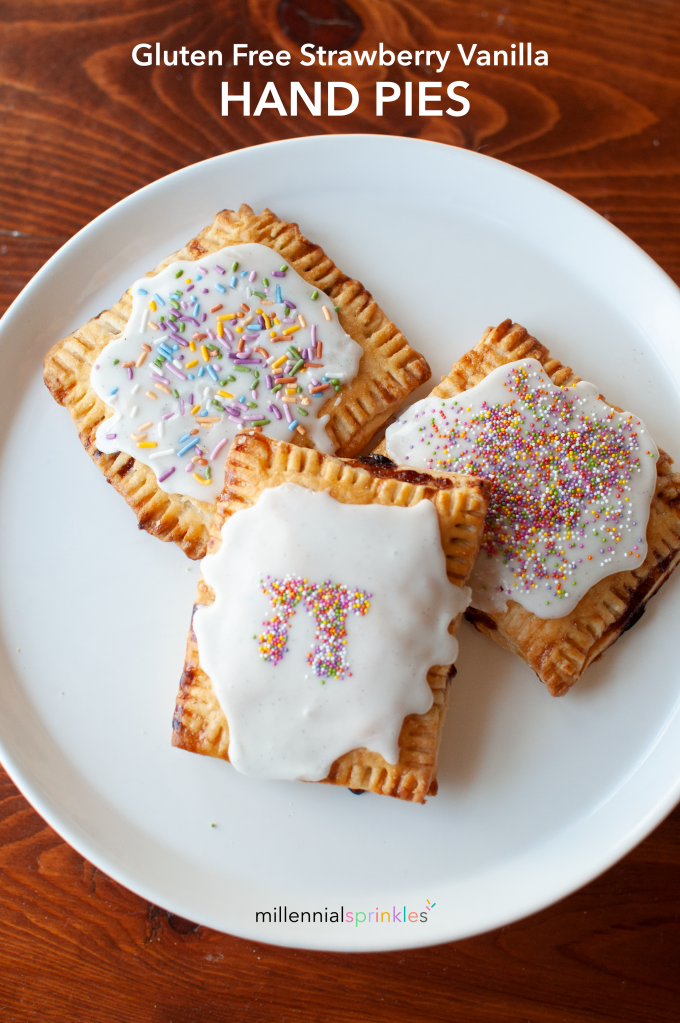
That said, as much as I love eating actual pie for Pi Day, the more I thought about it the more I realized that I wanted hand pies this year instead! They’re cute, delicious, quicker to make, and honestly more fun and forgiving than making a real pie. And if you want to be super accurate with the whole “Pi Day” thing, make them into circles instead of rectangles. 🙂
A few things to note about this recipe:
- Use a scale to measure your flour by weight. Measuring flour by weight for gluten free baked goods helps ensure that it will come out right every time!
- Use a large food processor to combine the flour and butter. This helps get everything together quickly so that the butter stays cold and solid (see my next note for more info on why cold butter is super important).
- Work quickly, and use COLD butter and water! This recipe uses a European Style butter which is higher in fat content, so it’s a bit softer at room temperature than its American lower fat content counterpart. The key to getting the flakiest, most delicious pie crust dough (or, really any pastry dough) is to work quickly to make sure the butter remains cold before baking.
- Hint: cut up the butter and put it into the freezer for about 15-20 minutes before making the dough. This way it’s much less likely to get too warm while you’re working with it before baking!
Gluten Free Strawberry Vanilla Hand Pies
(pie crust recipe is based off of the one by fromscratchfast.com)
Prep Time: 30 minutes | Cook Time: 25-30 minutes | Total Time: 55-60 minutes | Serves: 4-6
Ingredients:
Pie Crust:
- 326 grams of Cup4Cup brand gluten free flour (you can use other flour blends, but Cup4Cup is the best option for a gf pie crust)
- 1/2 teaspoon kosher salt
- 1 tablespoon sugar
- 2 sticks unsalted European style butter cut into 1/2 inch cubes – I recommend Kerrygold
- 1 teaspoon apple cider vinegar
- 1/3 to 1/2 cup cold water
- 1 egg + 1 tablespoon water (for egg wash right before baking)
Filling:
- 1/2 cup strawberry jam
- 1/2 teaspoon vanilla bean paste
Glaze:
- 1 cup powdered sugar
- 2 tablespoons of milk or heavy cream (whatever you have on hand, dairy-wise, is fine)
- Note: if you add too much milk by accident, just add in some more powdered sugar until it’s a thick and slightly runny consistency.
- 1/2 teaspoon vanilla bean paste — because we don’t have enough vanilla in the filling already, hah!
- Sprinkles / decorations to make your hand pies look festive and fun!
Directions:
- Make the dough. Cut up butter and place into freezer for 15-20 minutes. Meanwhile, put the flour, salt, and sugar in a food processor and pulse to combine.
- Remove butter from the freezer and sprinkle over the flour in the food processor. Pulse until the mixture looks crumbly with larger, pea-sized chunks of butter. Drizzle the apple cider vinegar over the top.
- Turn the food processor on and immediately start slowly drizzling the cold water through the feed tube at the top. Once the mixture starts to come together and is shaggy-looking, stop the processor and give the dough a pinch. If it sticks together, it’s ready. If not, turn it back on and drizzle in more water until it gets to the consistency needed.
- Transfer the dough to a lightly floured surface and shape into a ball. Using a dough scraper, divide the dough into two equal pieces and form each into a flat disk. Wrap the disks in plastic wrap and refrigerate them for at least 30 minutes or up to 2 days.
- Note: they can also be placed in freezer bags and frozen for up to three months. Thaw them in the refrigerator overnight before using.
- If the dough has been in the fridge for several hours, before rolling it out let it sit at room temperature until slightly softened and workable, about 10-20 minutes.
- Roll out the Dough. Take the dough out of the fridge and roll it out in between two lightly floured pieces of parchment paper until it’s about 1/4-inch thick (the small amount of flour is important, because otherwise it will stick). If the dough starts to immediately crack once you start rolling, it’s too cold – let it rest for a few more minutes to warm up, then continue rolling it out. If the edges crack as you roll, just patch them as needed, that’s totally fine! This dough is pretty forgiving overall.
- Using a sharp knife or a pizza cutter, cut the edges off so you end up with a large rectangle. Cut smaller rectangles that are about 4.5 inches wide by 5 inches high. Arrange the rectangles onto a parchment lined baking sheet.
- Make the Filling. Mix the filling ingredients together in a small bowl. Place one or two tablespoons of the filling in the center of half of the rectangles, then spread it out but leave about a 1/2-inch border. Place the other rectangles on top and use a fork to crimp the edges to prevent the filling from leaking out in the oven. Poke the top of each hand pie with a few holes with the fork to allow steam to escape as they bake. We don’t want any exploding hand pies!
- Back to the fridge! After the hand pies are filled and sealed, place them in the refrigerator on a sheet pan to firm up for another 30 minutes. This helps them keep their shape in the oven and ensures a flaky crust.
- Egg wash and bake. Preheat the oven to 375 degrees Fahrenheit. Make the egg wash and brush the top of each hand pie with a little egg wash. Once preheated, place the baking sheet into the oven. Bake for 25-30 minutes until the tops are golden.
- Remove hand pies from oven and cool on the baking sheet for 5-10 minutes. Remove from baking sheet and place on a cooling rack to fully cool.
- Glaze and Decorate! Once the hand pies are completely cooled, mix the ingredients for the glaze. Using an offset spatula, gently place some glaze in the center of the hand pies and spread outward. Decorate with sprinkles, if desired. Then enjoy!


Leave a comment